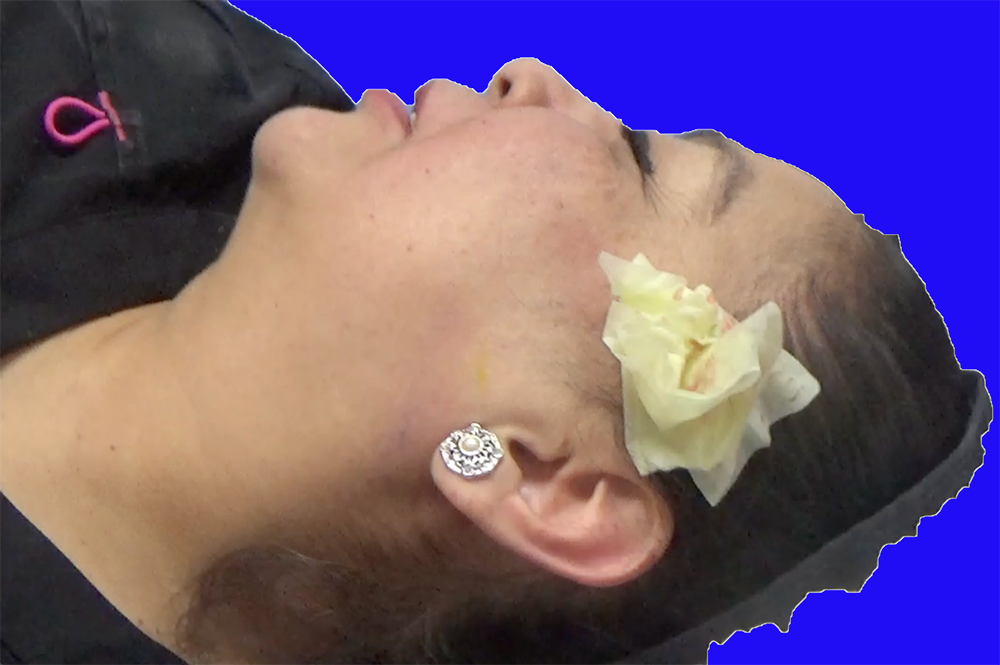
Position of Physician : Always contro lateral to the hemiface to treat
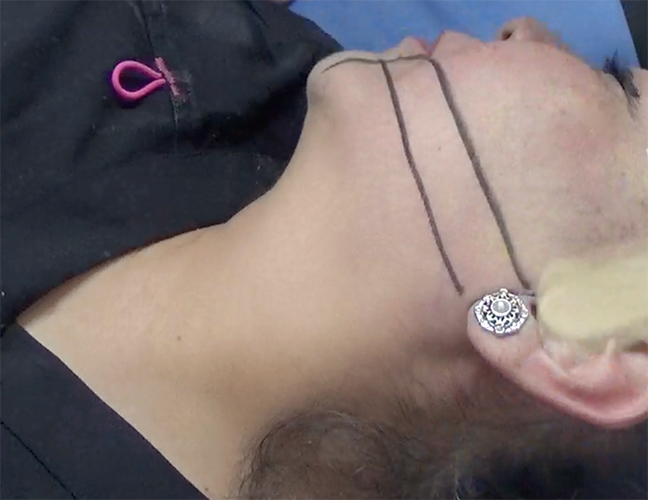
Step2 :Internal limit of the area to treat (supramandibular lower third)
marking a vertical line beginning from the external labial commissure
The internal limit of the supramandibular lower third to treat is determinated by a vertical line beginning from the external labial commissure and ending at the mandible.
Step3
Internal Limit of the Supramandibular Lower Third Area
The internal limit is marked
step 4 : marking the pretragal incision for a facelift
External Limit of the Lower Third Supramandibular Area
The external limit of the Supramandibular Area of the lower third ( area to treat) corresponds exactly to the pretragal incision line done for a surgical facelift.
Step 5 Marking the lower limit of the supramandibular area
Lower Limit of the SupraMandibular Area of the Lower Third
you need to take a wooden tonguer and place the middle of its length on the maximum convexity of the mandible.
Then the upper edge of the wooden tonguer corresponds exactly to the lower limit of the supramandibular area.
We chose this trick to avoid injections in the periosteum of the mandible which may cause ecchymosis .
Step 6 :Marking the lower limit of the supra mandibular area
Drawing a line at the upper edge of the wooden tonguer
Step 7: Dont touch the periosteum and avoid ecchymosis
Goal to mark the inferior limit of the supra mandibular area
On this picture, the index finger of the left hand of the practicioner shows the area ( under the black line) where NO INJECTIONS should be done , so that there will be no risks to hurt the periosteum of the mandible, which would generate huge ecchymosis.
Lets definite as FORBBIDEN INJECTION AREA, the area limited up by the black line and down by the mandible convexity.
Step 8: Marking the Upper Limit of the Supra Mandibular Area
Upper Limit of the Supra Mandibular Area
The inferior edge of the wooden tonguer has to be placed exactly on the line corresponding to the inferior limit of the supra mandibular area .
The upper edge of the wooden tonguer corresponds exactly to the upper limit of the supra mandibular area .
Step 9 : The supra mandibular area and it s edges
The supra mandibular area with its limits or edges
The edges of the supra mandibular area of the lower third of the face are limited by :
Lower limit: the upper limit of the wooden tonguer if its middle line is applied on the mandible convexity
Upper limit : the upper limit of the wooden tonguer if the lower limit is placed like above mentioned
Internal Limit : the vertical through the external labial commissure down to the mandible convexity
External Limit : the line of pre tragal incision for a surgical face lift
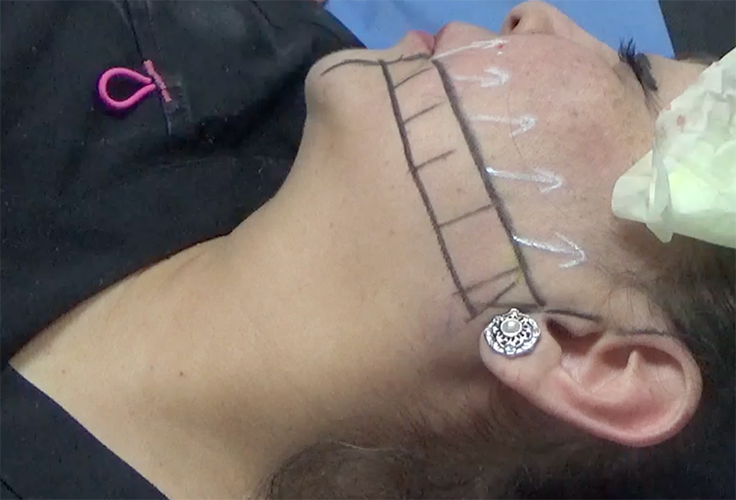
Step 10 : from inside to outside in squares
Division of the Supra Mandibular Area
Divide the supra mandibular area in squares from the internal edge to the external one using the wooden tonguer to mark squares of same dimensions .
Step 11: Upper and Lower tensors are parallel to the pre tragal incision for a surgical facelift
Marking the tensors of the supra mandibular area
The tensors have as sense and direction the parallel to the line of pretragal incision for a surgical facelift
Its recommended to place the thinnest edge of the wooden tonguer against the pre tragal incision line for a surgical facelift.
It will give then the sense and the direction of the tensors applied to the lower third of the supra mandibular area.
Step 12 : Upper Tensors are parallel to the line of pre tragal incision for a surgical facelift
Marking the upper tensors of the supra mandibular area
All upper tensors are applied to the superior edge of each square of the supra mandibular area.
they are mostly parallel to the pre tragal incision line of a surgical facelift.
Step 13 : 2 Tensors per Square , 1 Upper and 1 Lower
Upper and Lower Tensors of the supramandibular area
Upper Tensors are marked as seen on the picture in white and they are all parallel to the pre tragal incision line used for a surgical facelift.
Lower tensors are parallel too to the pre tragal incision line used for a surgical facelift and/or have same sense and direction of the upper tensor of the same square.
All tensors begin from the ,, red cross ,, as seen on the picture
Step 14: Position the syringe on each tensor before injecting
Positioning of the syringe for upper tensors before injection
Position the syringe on each upper tensor and glide it until the top of the needle reaches the red cross of the upper line of the chosen square
The syringe has to be in full contact with the faces skin ( dont put your finger under the syringe).
Then push for injection without moving the hand .
Step 15: Sense and direction are parallel to the upper tensor
POSITIONING OF THE SYRINGE FOR LOWER TENSORS BEFORE INJECTION
Position the syringe on each upper tensor and glide it until the top of the needle reaches the red cross of the lower line of the chosen square
Then push for injection without moving the hand .
Step 16 & Step 17: Tensor Injection
PUSH THE SYRINGE WITHOUT MOVING THE HAND
To push the syringe for tensors injections is very important, not only to fight against Archimedes forces but also to get a good result.
Not pushing will lead to no results and may cause an edema.
Dont push in too many times as the needle could break and an edema may appear.
The syringe has to be in full contact with the patients skin, without any angulation between the syringe and the patients skin.
When taking off the syringe,it has to be done quickly to avoid any pain as edema.
Control always your needle after you take it off for each tensor injection, as it could be broken or break if deformated.In such case change the needle.
If the patient feels pain, change immediately of needle. ( A hard needle can break easily and damage the tissues).
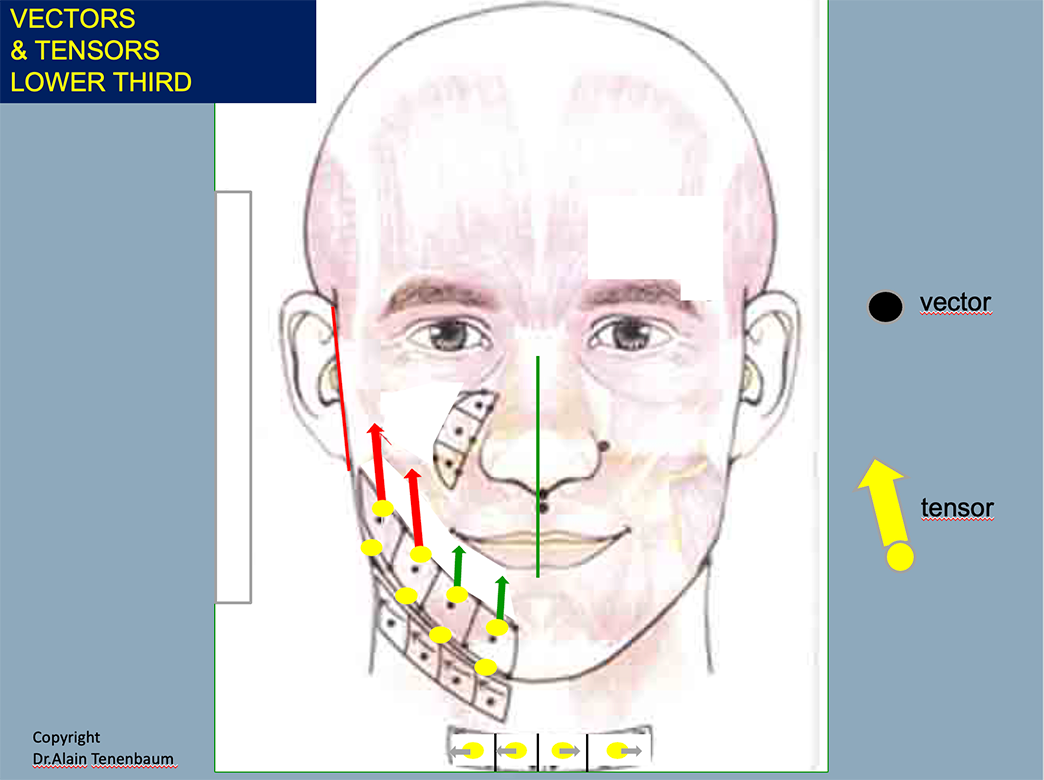
Step 18: Vectors
VECTORS AND INJECTIONS
injection of vectors have to be done at the center of each square, with a syringe 1 ml luer lock thick one and an ultra flexible needle 30g1/2
quantity of injection per point is 0.05ml or 1/2 graduation on the syringe 1 ml Luer lock BD.
Position of the hands is very important as shown on the picture .
The syringe is inclinated to make 70 grades with the horizontal and 30 grades with the vertical, to avoid to reach the mandible periosteum.
Never inject normal to the plan of the muscles in this case (the syringe has not to make an angle of 90 grades with the horizontal or plan of the muscle)
Step 19: See injections movements
TAKE A LOOK HOW TO DO VECTORS
Step 20: See injections movements
TAKE A LOOK HOW TO DO TENSORS
This site uses cookies to ensure the best experience. By continuing to use this website, you agree to their use. Learn more about our privacy policy