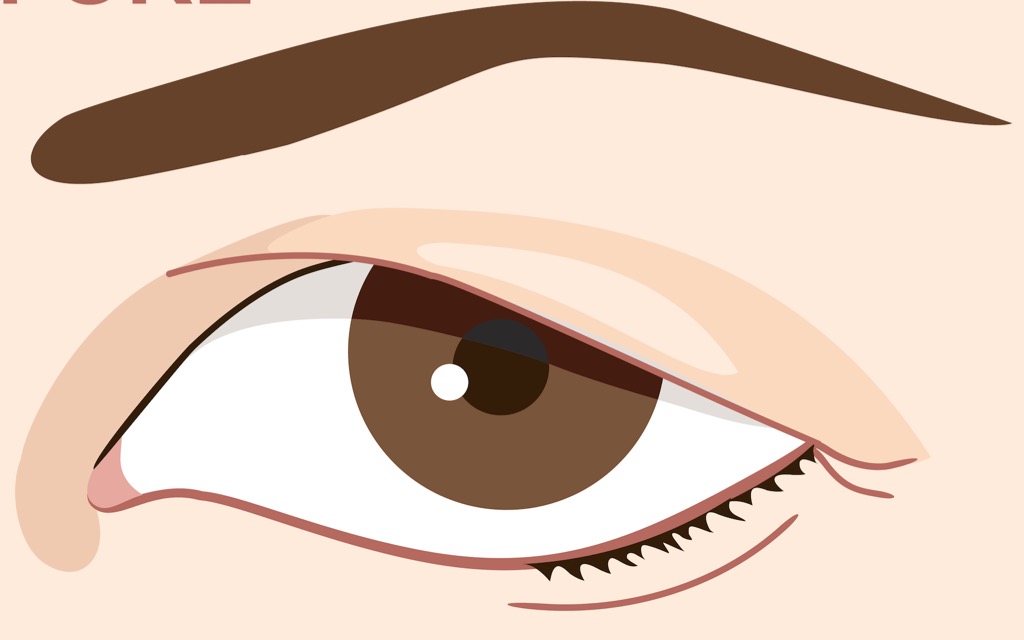
Surgical Definition
Fox eye surgery involves performing a combination of :
-
An Upper Blepharoplasty
-
A Surgical Browlift
designed to elevate the outer part of the eyebrows
Have you ever wondered how some people have those captivating Foxy Eyes that instantly grab your attention? Well, the secret lies in the innovative Endopeel Techniques. By incorporating isovolumetric myoplasty, myopexy, and myotension, you can achieve a stunning look that will turn heads wherever you go.
Isovolumetric myoplasty is a technique that focuses on reshaping the muscles around the eyes to create a lifted and elongated appearance. By targeting specific muscles, this procedure can give you that desirable foxy-eyed look, enhancing the natural shape of your eyes and making them appear more alluring.
Another technique, myopexy, involves repositioning the muscles to create a lifted effect. This procedure can help correct droopy eyelids or sagging skin around the eyes, giving you a more youthful and alert appearance. With myopexy, you can achieve a natural-looking transformation that enhances your overall facial features.
Lastly, myotension is a technique that focuses on tightening the muscles around the eyes. By improving muscle tone, this procedure can help reduce the appearance of wrinkles and fine lines, giving your eyes a smoother and more youthful look. With myotension, you can achieve a rejuvenated and refreshed appearance that will make you feel confident and beautiful.
Imagine waking up every morning with captivating Foxy Eyes that make you feel like a true beauty icon. With the help of Endopeel Techniques, you can turn this dream into a reality. Say goodbye to tired-looking eyes and hello to a mesmerizing gaze that will leave a lasting impression.
So, if you're ready to enhance your natural beauty and get those captivating Foxy Eyes, consider exploring the transformative power of Endopeel Techniques. Consult with a trusted professional who specializes in these techniques, and embark on a journey towards a more confident and captivating you.
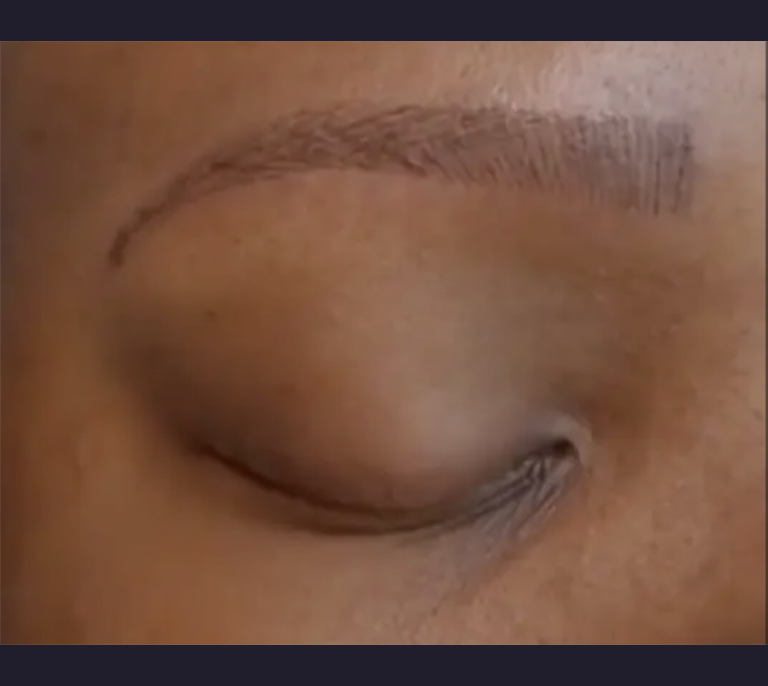
Surgery is necessary.
No medical method can correct it.
Just a skin resection in such case is useful without removing fat pads.

Only surgery needs to be done in such cases.
Hairless Eyebrow corrected by Tatoo is an absolute contra-indication as tatoo
can t change it s shape by any means
( it s not a muscle ) .
Injections of Endopeel like 0.2 ml in vectors and 0.3 ml as tensors have been done on the cadaver with immediate results.
This means once again that with Endopeel we can reshape in 3D without any volume augmentation any muscles .
Consequences of this study are the followings :
with clinical implications like

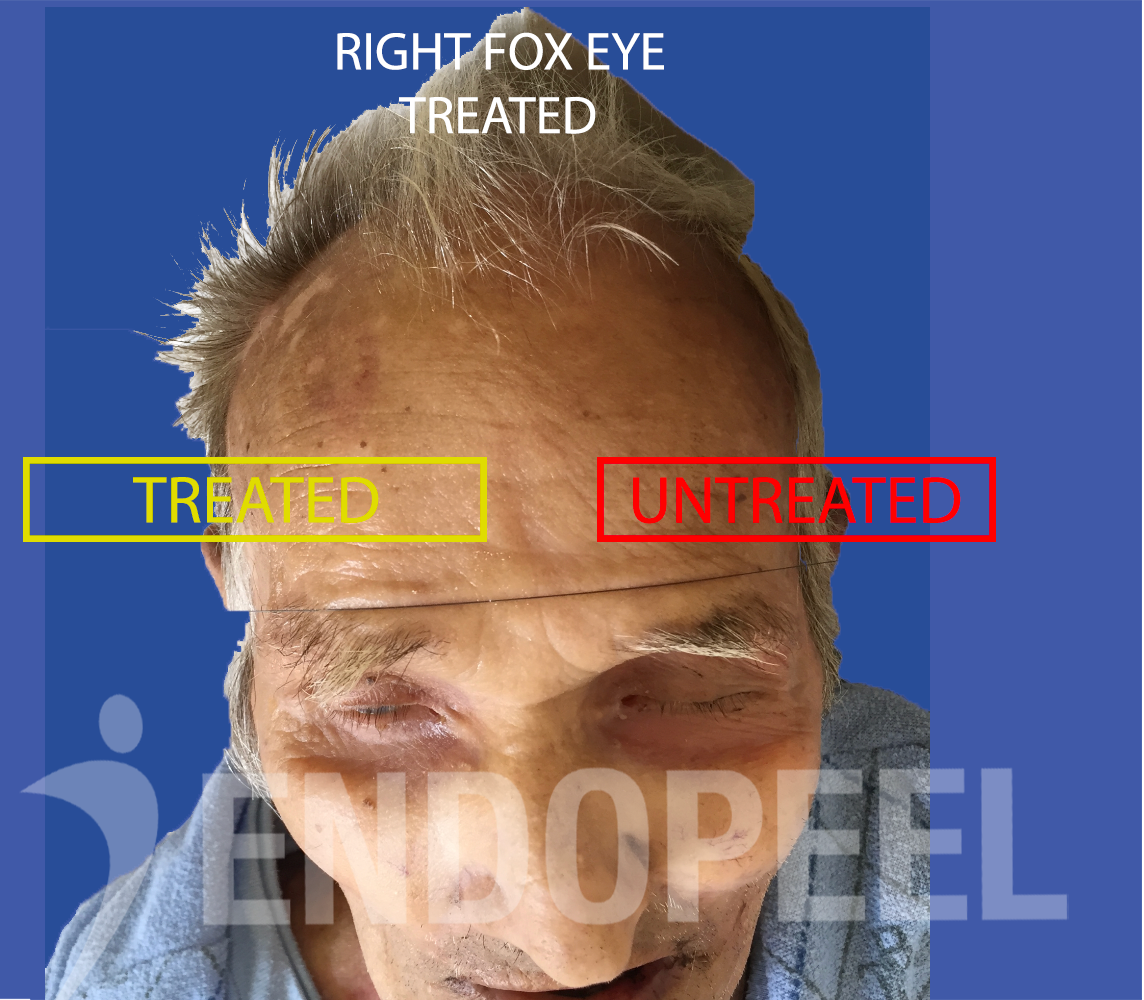
No upper blepharoplasty has been performed in this case

the green segment corresponds to the increase in the designated distance

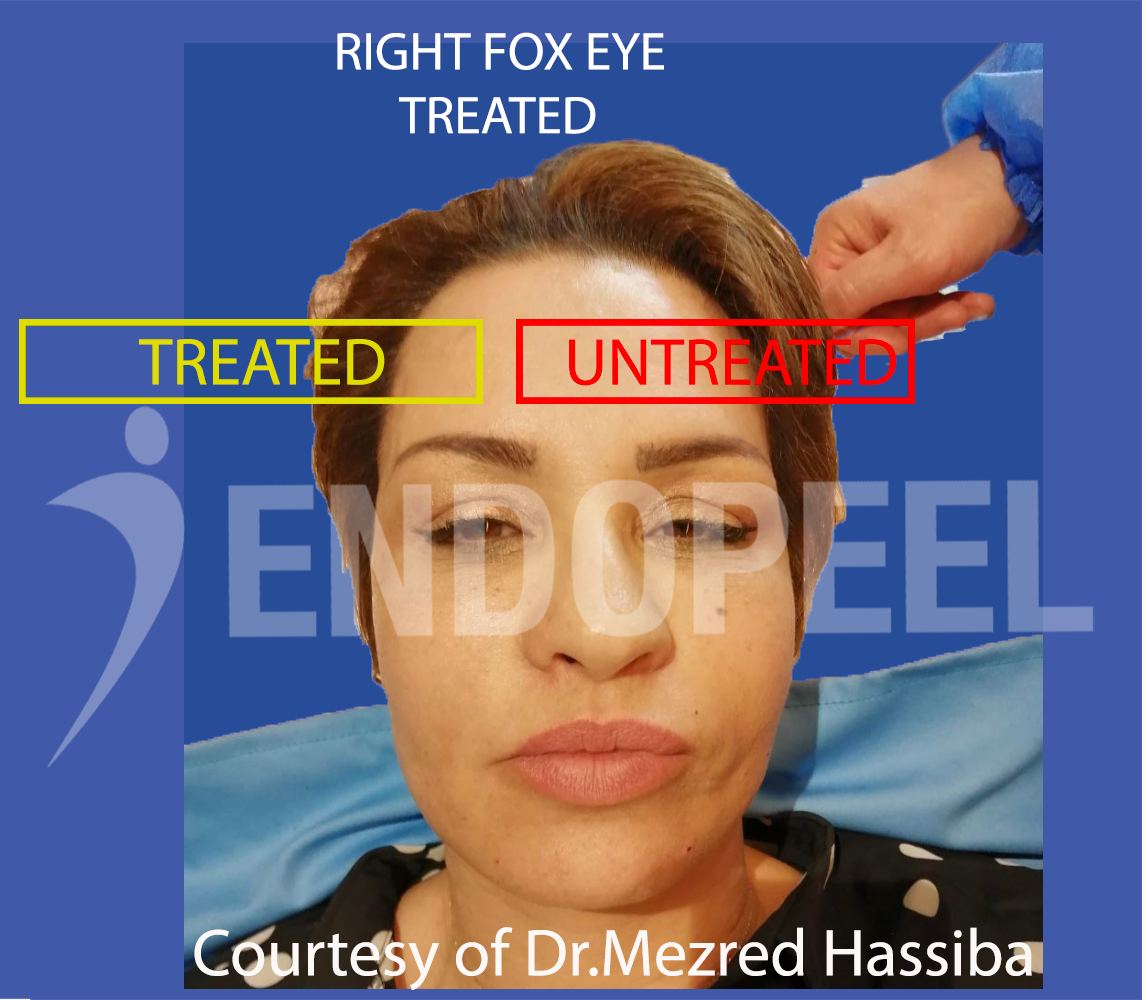
The angle between the eyebrows cauda and the eyebrows radix should be at the end more obtuse or wider.
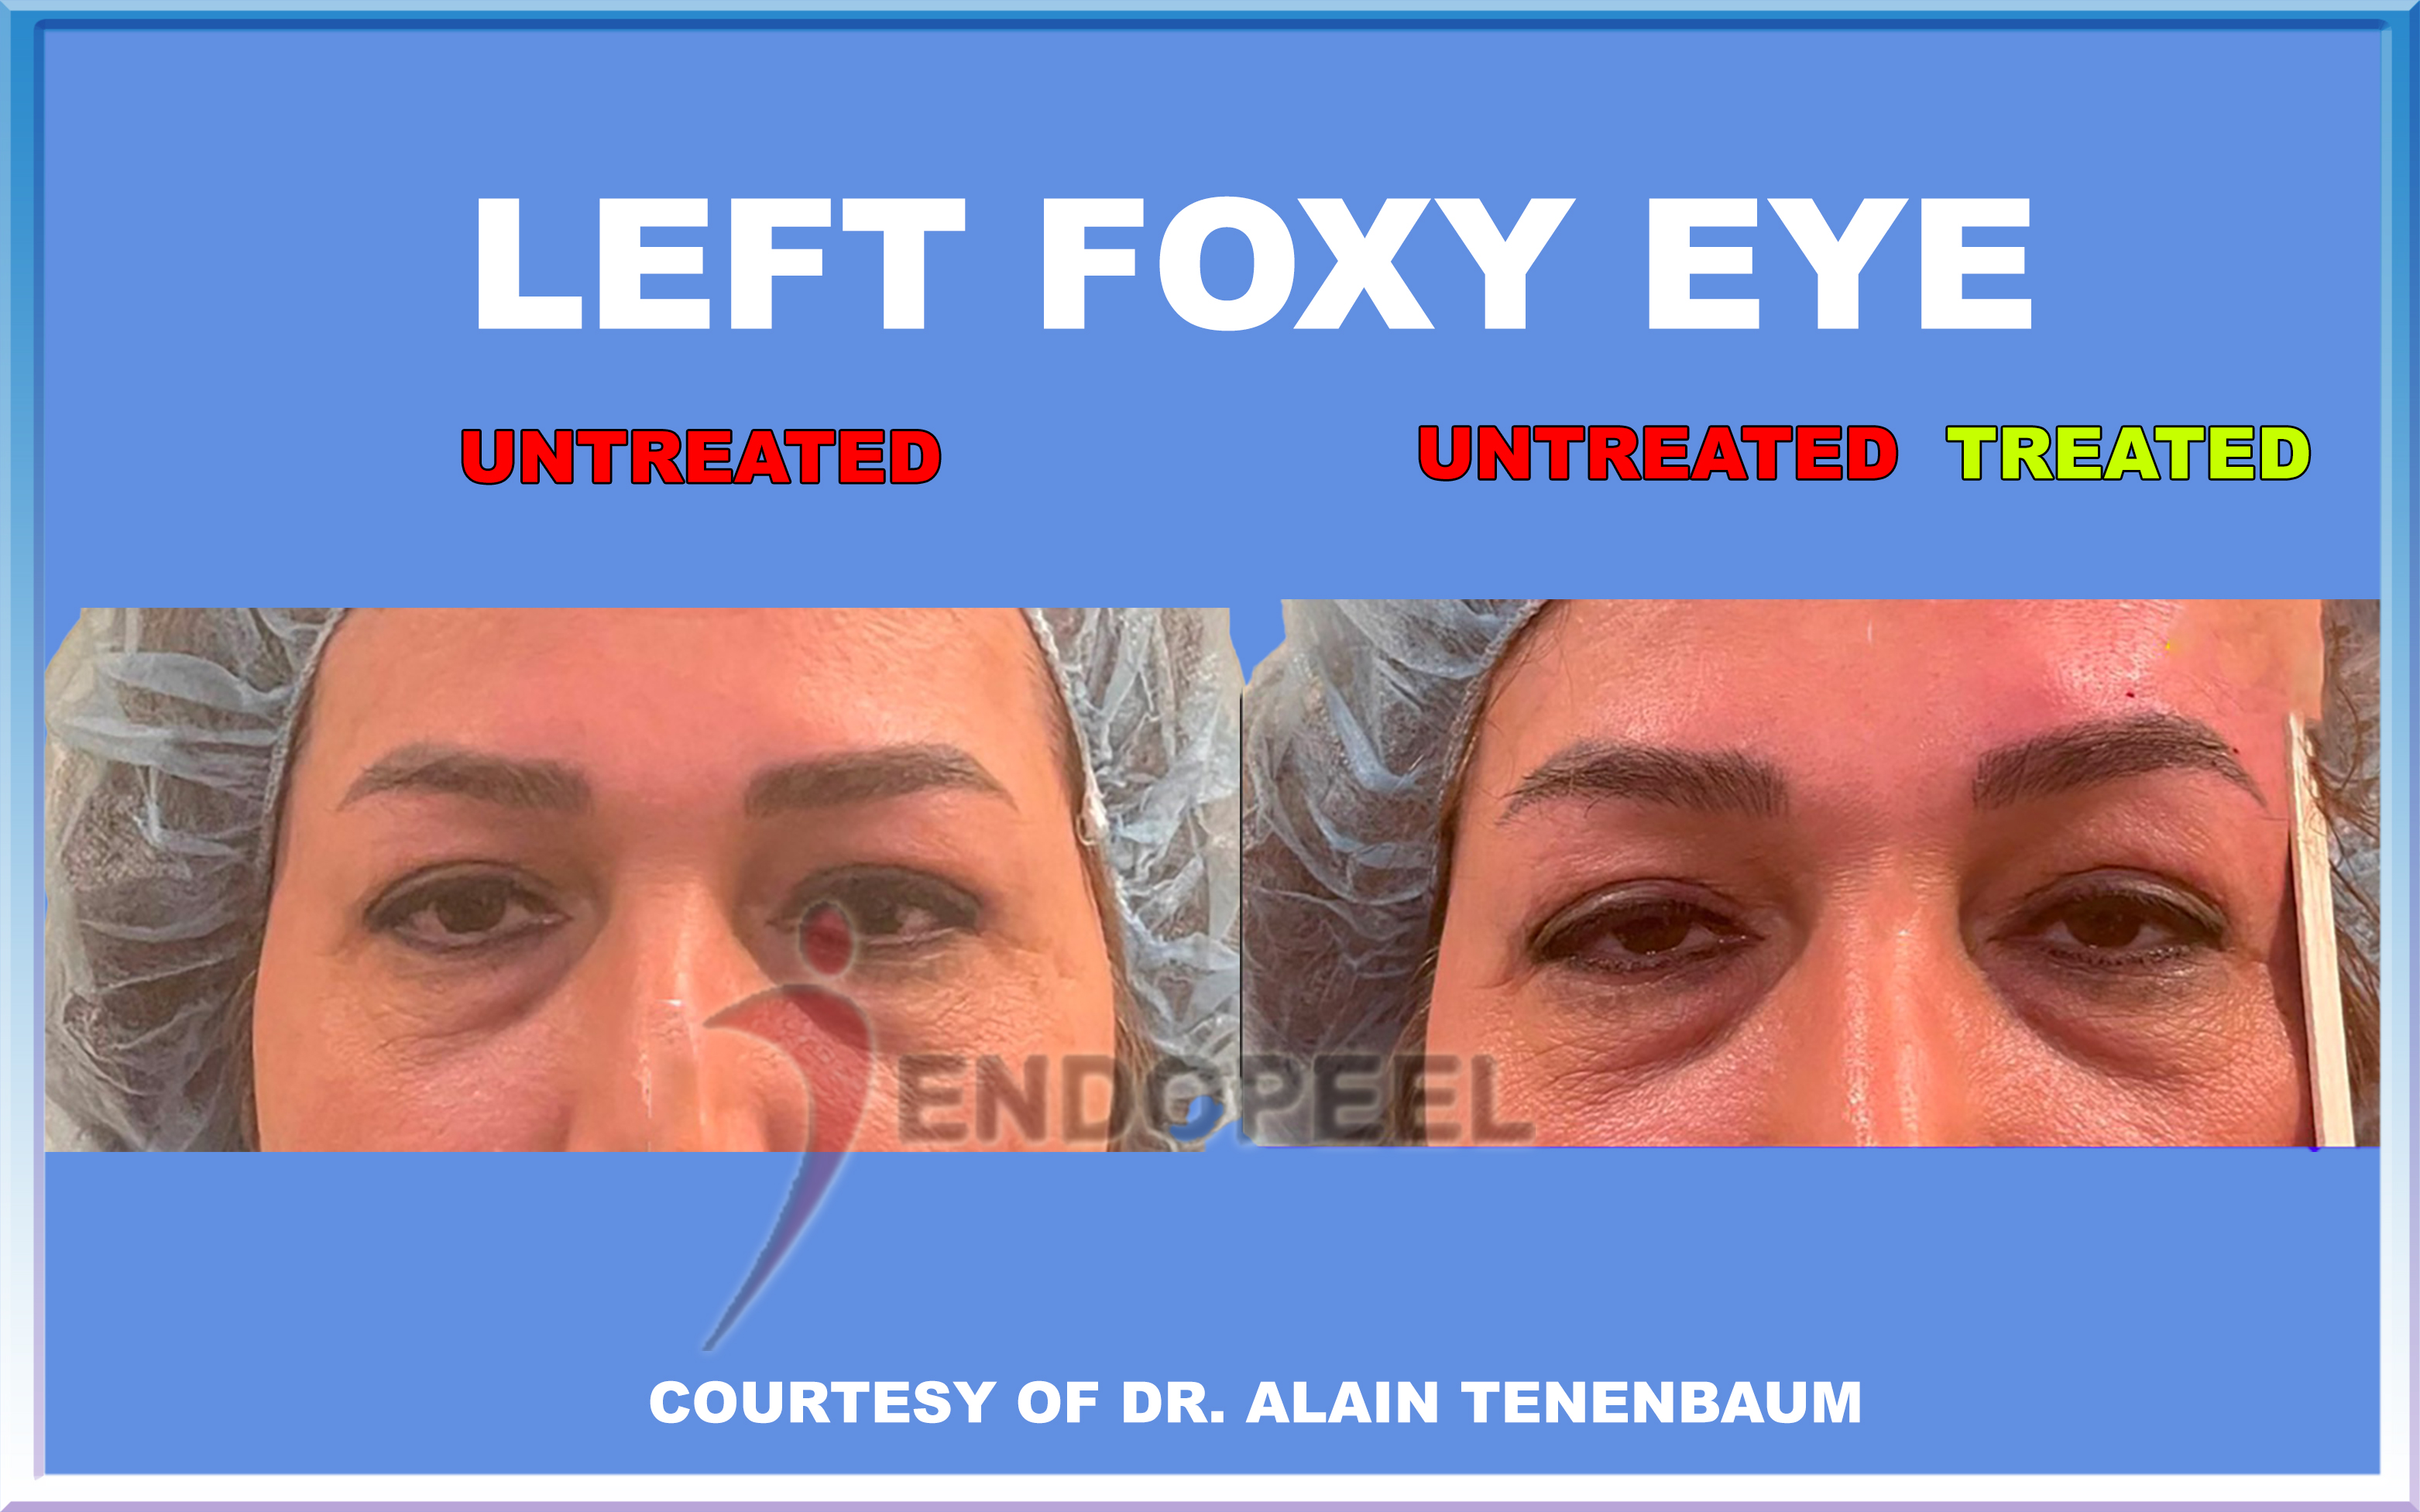
Here is initial angle before treatment.
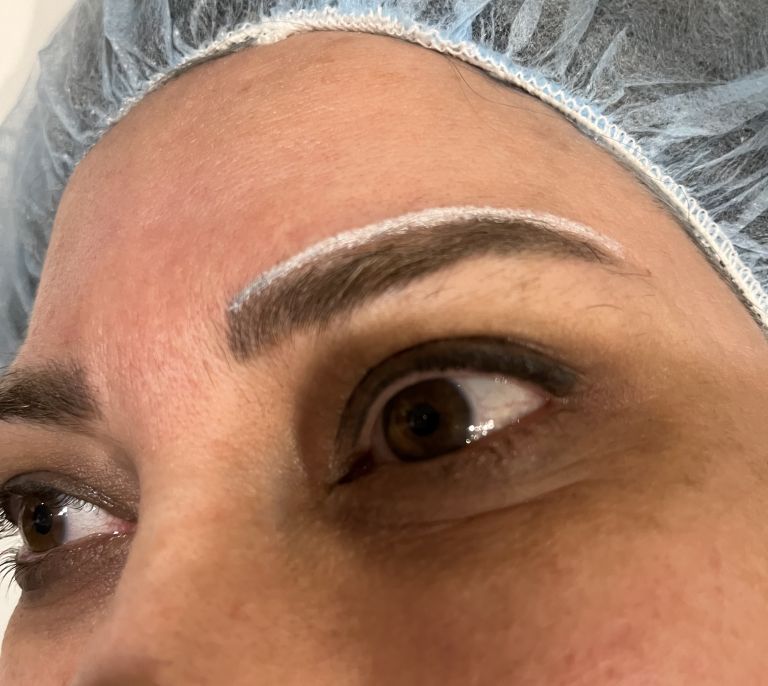
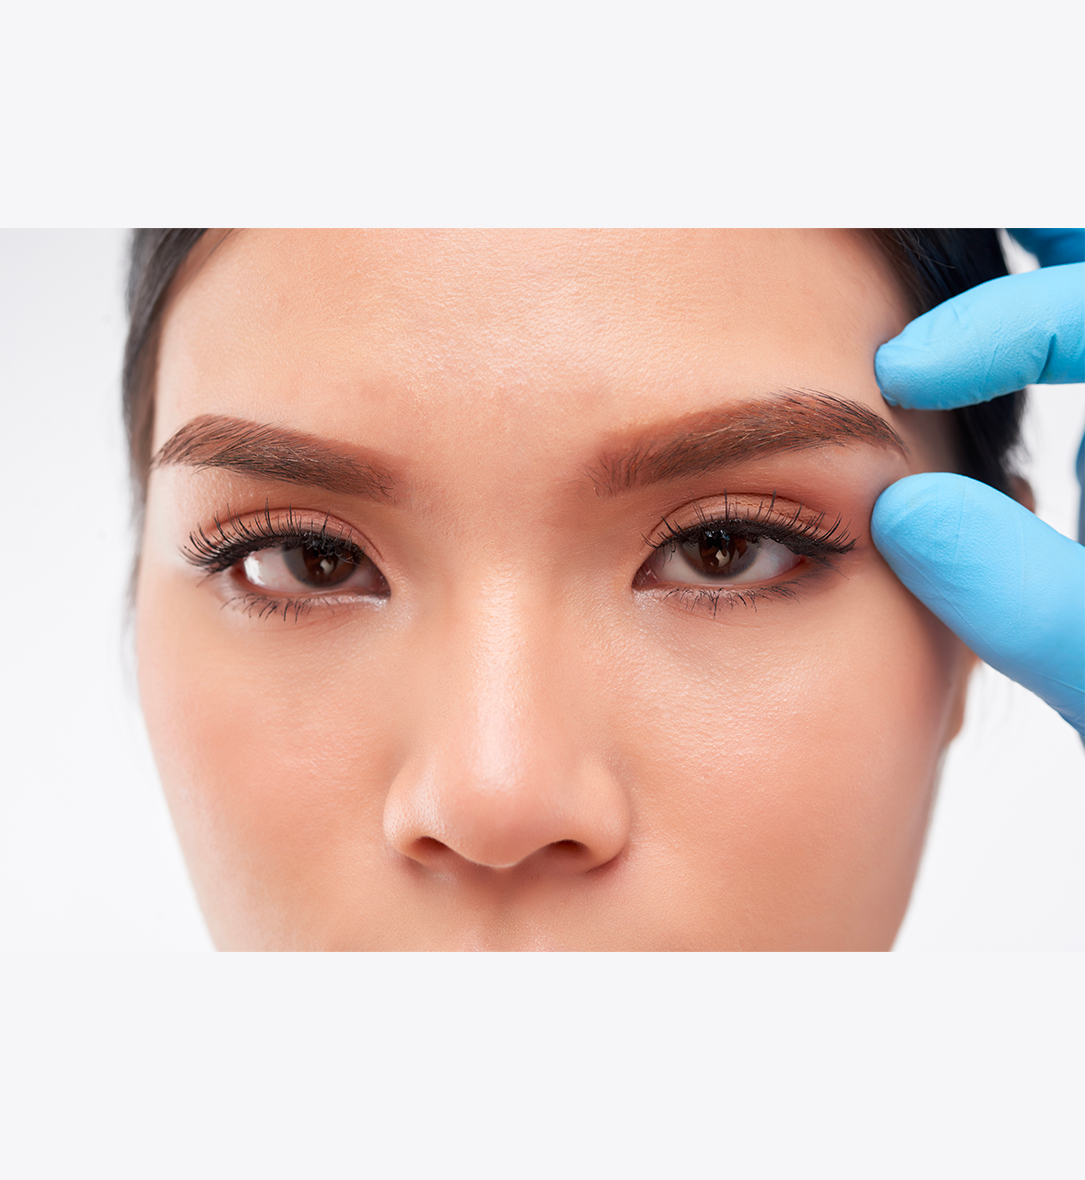
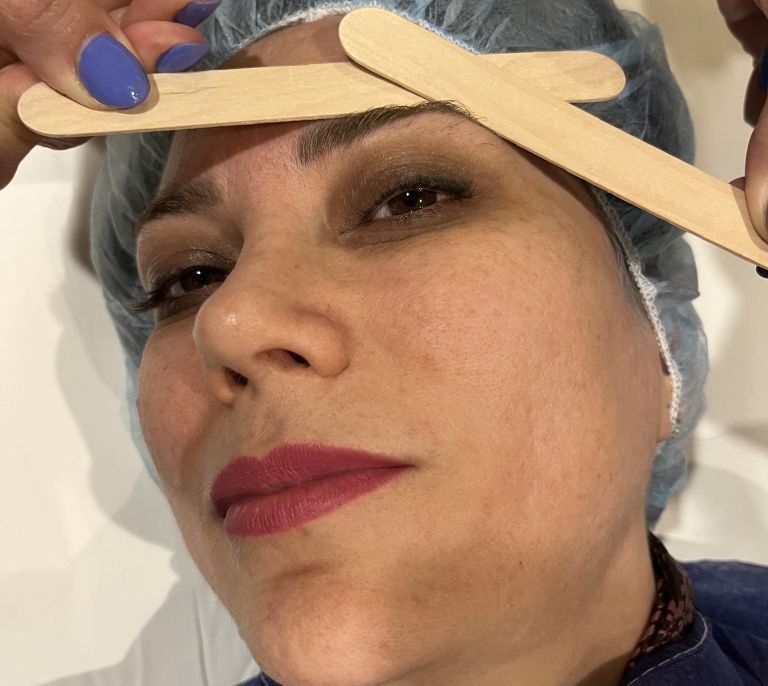
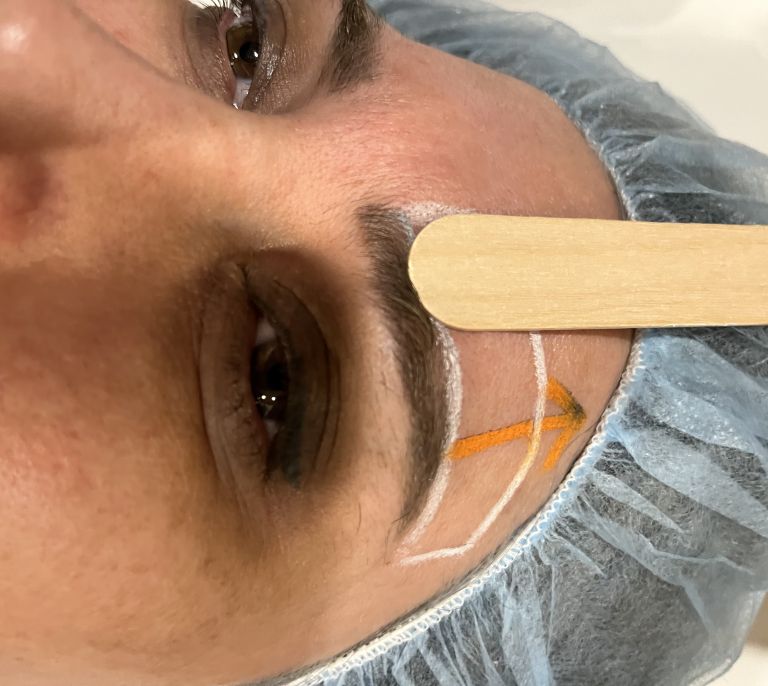
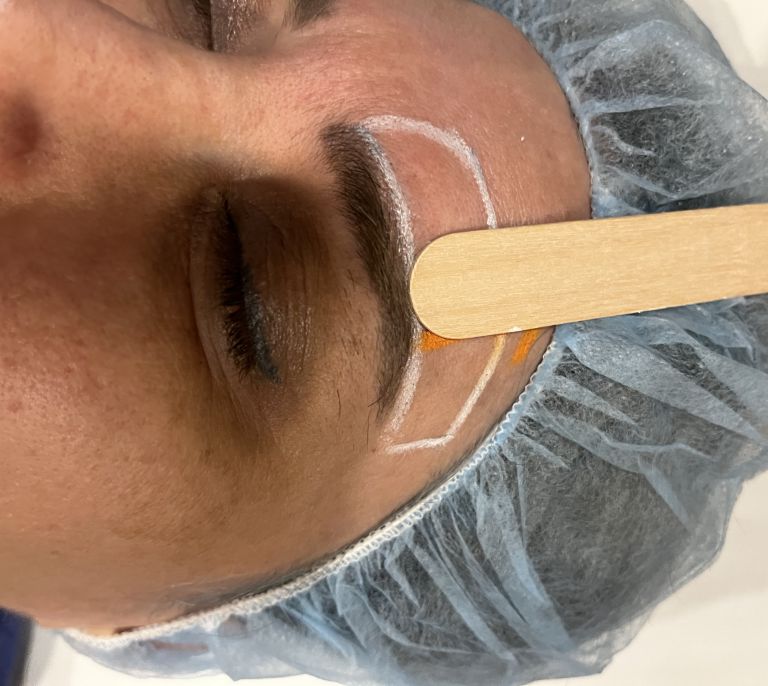
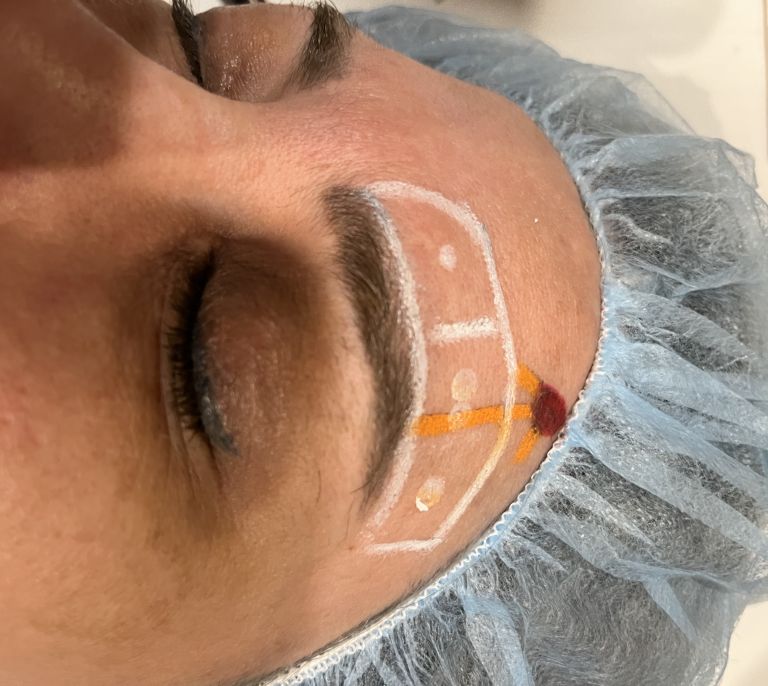
Mark with white pen the upper rim of the eyebrow.
This technique doesnt work for tatoo fake eyebrow .
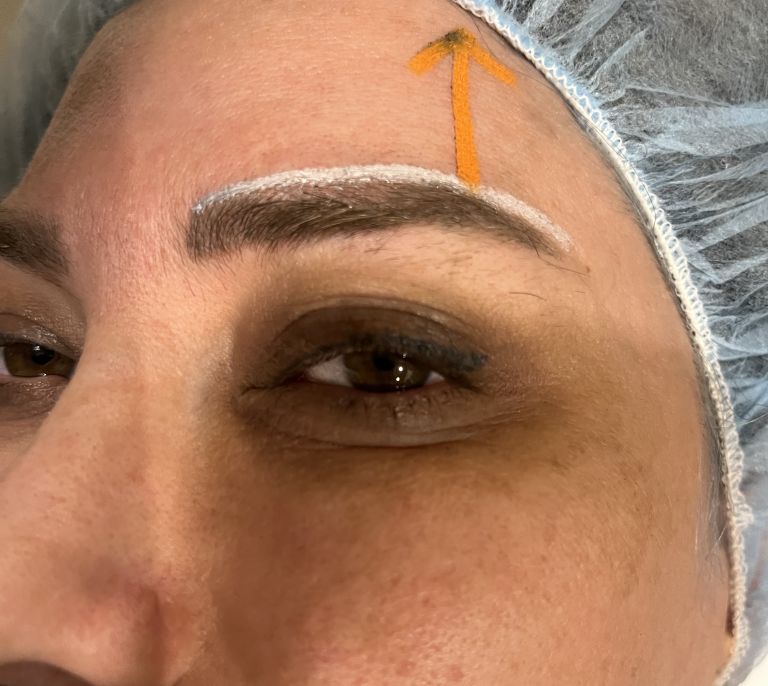
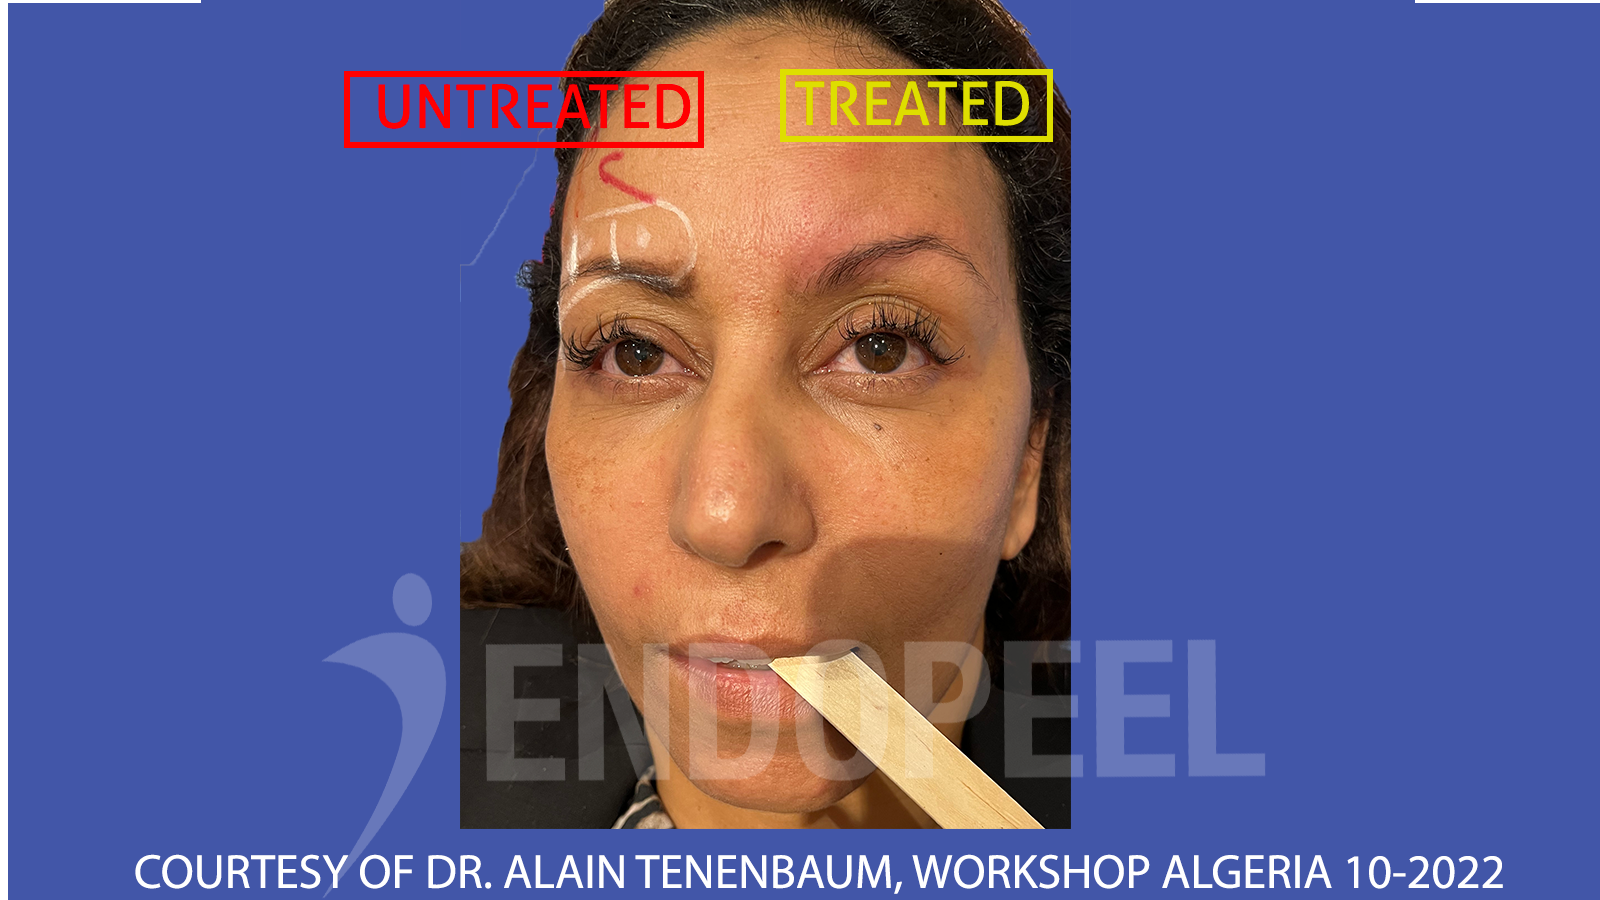
To get a fox eye,the important point to lift up has to be at 2/3-1/3 from in to out.( orange arrow).
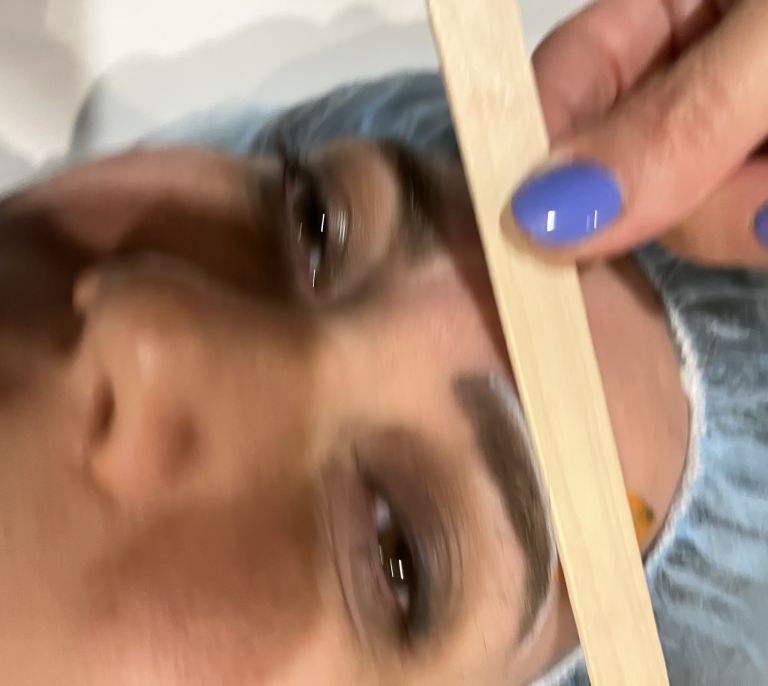
Apply the wooden tonguer parallel to the upper limit of the eyebrow to mark the upper limit of the area which will be worked out.
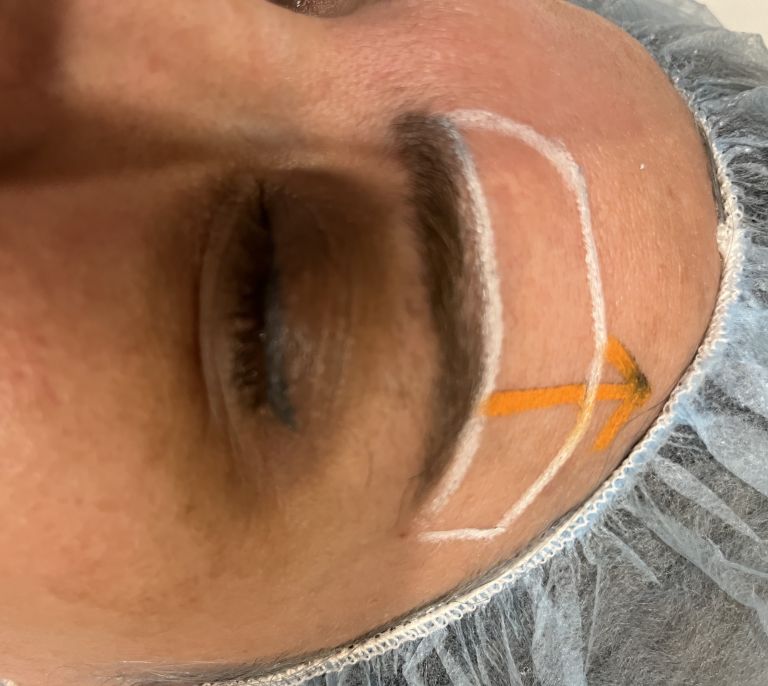
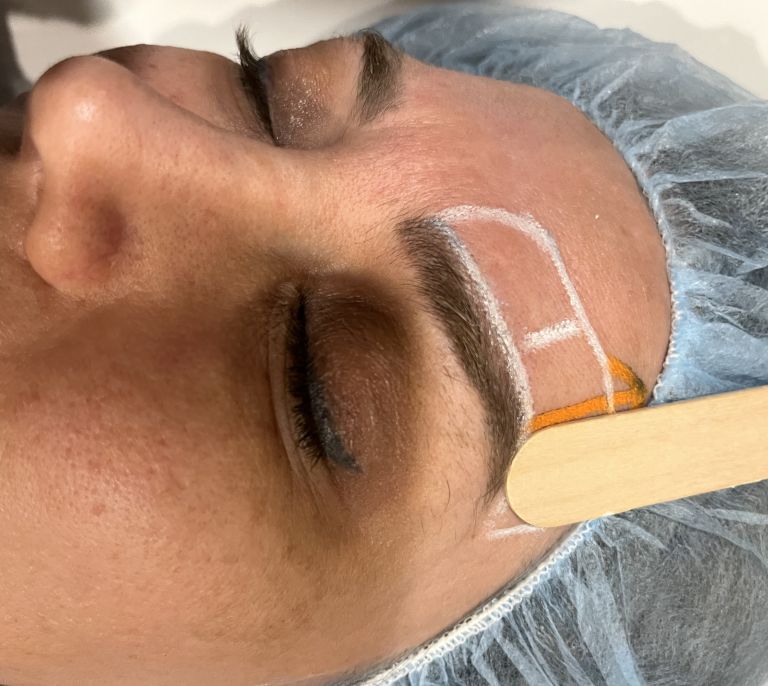
Lower and Upper Limit of the area which has to be worked out are marked with a white pen .
The orange arrow shows the point to lift up the eyebrow to get the best result for a fox eye look.
Now the previous area has to be divided in squares .
We use usually a wooden tonguer to divide the area in squares from in to out.
Here is 1 st square.
2 nd square.
Remember that for each square will be applied 1 vector normal or perpendicular to the center of the square and 2 tensors looking the point of maximum lift ( 1 from lower rim and the other from upper rim - or white marked borders)
Last square or 3 rd square , the most external one of the 3 squares.
The most important tensor lifting the eyebrow point to get a fox eye will follow the whole internal vertical border of this external square.
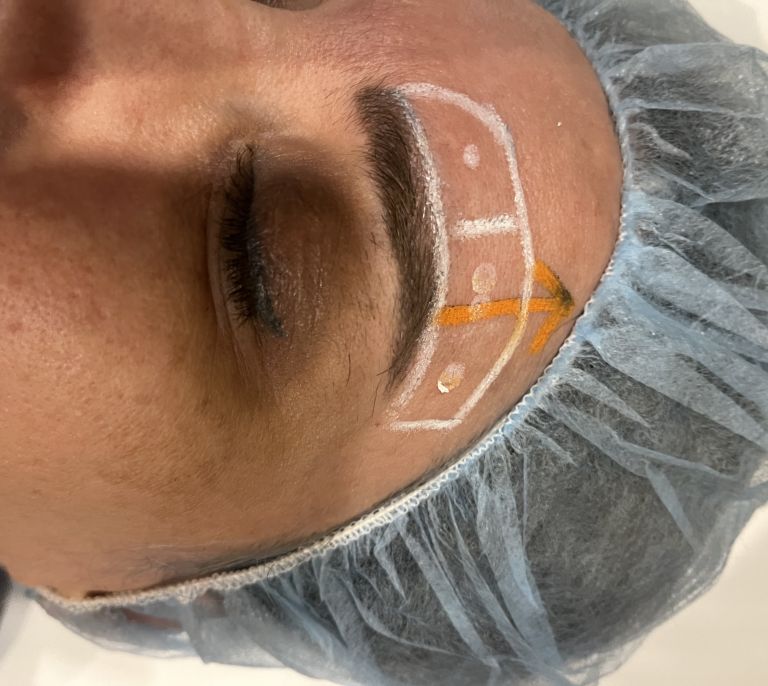
Each square has at its center a white marked point, where a vector should be applied.
Each vector will be realized with 0.05 ml of endopeels original product , normal or perpendicular to the square already marked.
Red marked is the maximum point of lifting ( called too maximum projection point) which is at the top of the orange arrow, where all tensors should converge.
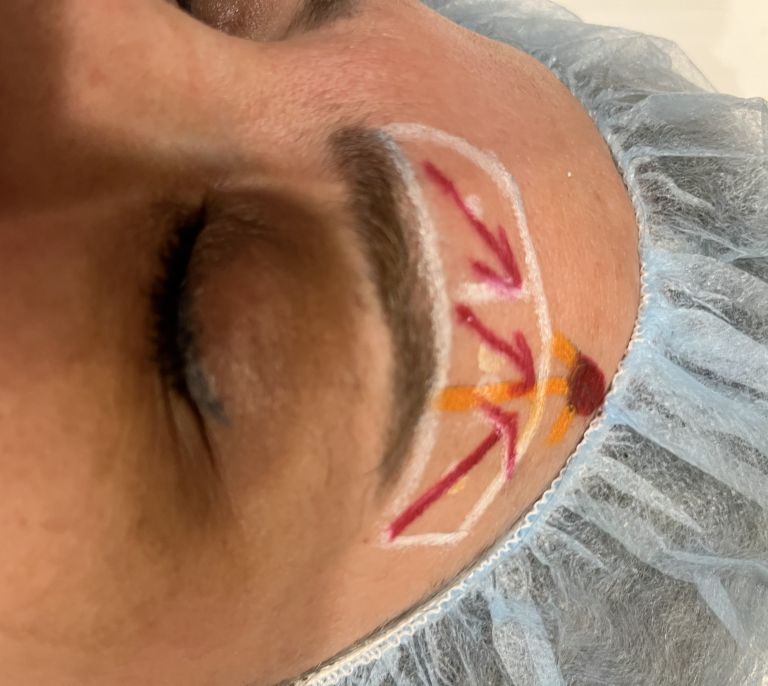
Red Arrows for Tensors are looking towards the maximum point of eyebrow lift ( red point at the top of the orange arrow.
Such tensors have to be from the lower ,, white,, line or upper rim of the eyebrow as from the upper ,, white ,, line.
For each tensor use 0.05 ml
Just for the orange tensors,use 0.1 ml.
It is mandatory to apply the syringe completely on the patients skin for each tensor with the right hand ( if you are right haded) and use the 2 nd finger of the left hand put on the maximum lift point or red point to get the good directions of the tensors , pushing against Archimede force, the syringe.
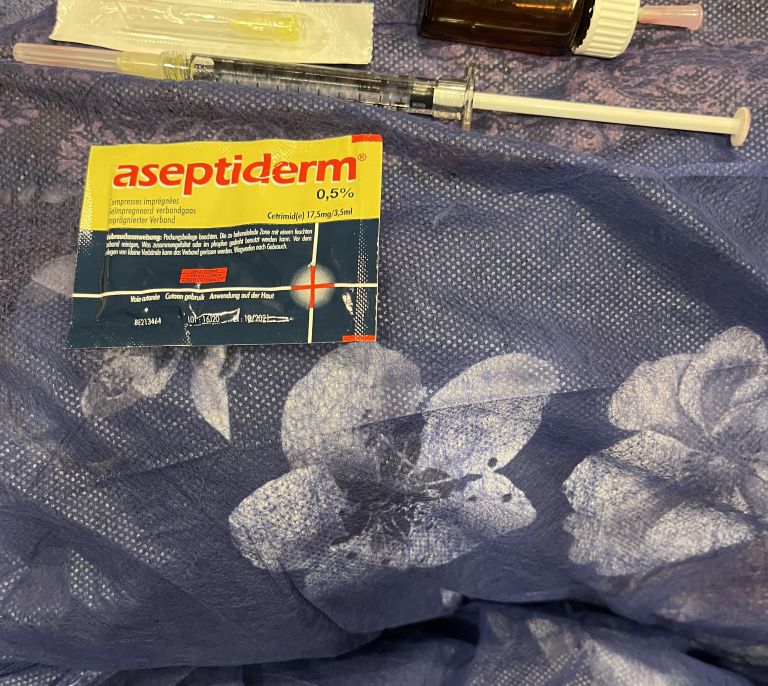
Desinfect only with non alcoholic solutions like Cetrimid or Chlorexhydine without alcohol applying a garte 10x10 for ex containing chlorexhidine on the marked area for not removing the marking.

1 st vector in the most internal square is done with the syringe normal to the center of the square, injecting 0.05 ml using the syringe BD 1ml luer lock thick one with a needle 30g1/2 BD ( The most flexible one) .
The position of the hand which is injecting is very important . ( Do not inject in the wind without any support )

2 nd vector always with 0.05 ml in the 2 nd square, perpendicular or normal to the center of the square.
The position of the injecting hand is important.

3 rd vector always with 0.05 ml in the 3 rd square, perpendicular or normal to the center of the square.
The position of the injecting hand is important.

Position the syringe on the arrow without moving the hand before injecting.
The whole syringe is in contact with the patients skin.
Never put a finger under the syringe.
The needle has to look towards the maximum point of lifting or projection ( red point).

After having positioned the syringe on the arrow, move it ( gliding or surfing) without moving the hand ( to keep the sense as the direction of the arrow) to the lower limit of the area to be worked out, preparing the 1 st tensor injection from the lower limit.
The syringe has to keep the whole contact with the patients skin without any angulation.

By injecting as 1 st tensor from the lower limit of the area to be worked out, it s necessary to push the syringe during the injection .

Without moving the injecting hand and sliding always the syringe on the arrow, 1 st tensor injection will be too performed from upper limit, always using 0.05 ml and pushing the syringe as previously.

For the second square and to inject the 2 nd Tensors, do same as previously by positioning correctly the syringe before injecting.

After having positioned the syringe on the arrow, move it ( gliding or surfing) without moving the hand ( to keep the sense as the direction of the arrow) to the lower limit of the area to be worked out, preparing the 2nd tensor injection from the lower limit.
The syringe has to keep the whole contact with the patients skin without any angulation.

For the third and last square and to inject the 3rd Tensors, do same as previously by positioning correctly the syringe before injecting.
The syringe as needle have to look as always towards the maximum projection or lifting point ( red point).

After having positioned the syringe on the arrow, move it ( gliding or surfing) without moving the hand ( to keep the sense as the direction of the arrow) to the lower limit of the area to be worked out, preparing the 3rd tensor injection from the lower limit.
The syringe has to keep the whole contact with the patients skin without any angulation.

By injecting as 3rd tensor from the lower limit of the area to be worked out, it s necessary to push the syringe during the injection

Without moving the injecting hand and sliding always the syringe on the arrow, 3rd tensor injection will be too performed from upper limit, always using 0.05 ml and pushing the syringe as previously.

For the maximum tensor ( orange arrow),do same as previously by positioning correctly the syringe before injecting.
This time,injection will be 0.1 ml ( double dose) towards the red point or maximum projection point.

After having positioned the syringe on the orange arrow, move it ( gliding or surfing) without moving the hand ( to keep the sense as the direction of the arrow) to the lower limit of the area to be worked out, preparing the maximum tensor injection from the lower limit.
The syringe has to be in whole contact with the patients skin without any angulation and towards the maximum point of projection ( red point).

By injecting the maximum tensor from the lower limit of the area to be worked out, it s necessary to push the syringe during the injection .
0.1 ml will be injected.
do not forget to inject the maximum tensor as well from upper limit, always with 0.1 ml.

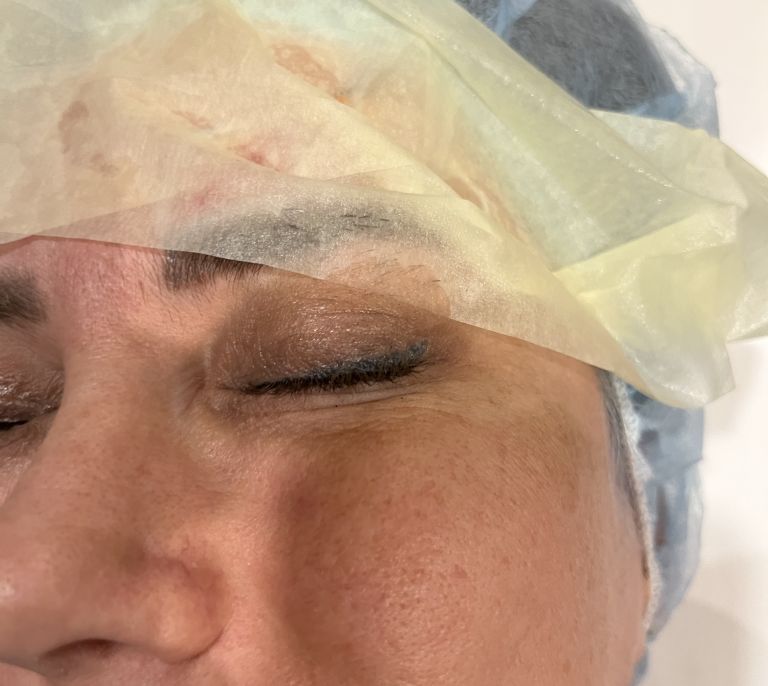
Prepare for massage the worked area, a cold cream without alcohol and without arachides.
It is recommended to use ,,Rose du Désert,, from Styling Cosmetics AG, Swiss Company.

Massage whole treated area with a cold cream, not alcoholic and without arachides like ,,Rose du Désert,,.